
DIY! Homemade Acrylic Flower Arrangements


I'm not sure about you guys, but I always check out the acrylic flower arrangements that stores have to offer, and they are always SO expensive, and they never have exactly what I'm looking for. I saw a video online of a DIY version and I was immediately entrigued. I saw that there was an acrylic water kit offered at Michael's and I was ready to give it a shot. 


This set was $14.99 (I'm pretty sure), and Michael's always has a 40% off coupon for a full priced item. With the coupon this ended up costing me about $9. 

I wanted a specific style of vase, that I of course couldn't find anywhere, and a friend of mine from work had one at home she let me have. I wanted white tulips, and again, they were kind of expensive. From Hobby Lobby and Michael's they averaged to about $2.99 for a single flower, so I decided to check online. I found a seller on eBay who was selling 6 flowers for $7.50, so I bought two sets. Total for the flowers was $15, including shipping. 


I arranged the flowers in the pot first. I had to cut the stems to make them work for my vase, and for that I used wire cutters (who am I kidding, my boyfriend used wire cutters I'm not strong enough). 


I then followed the instructions on the Quick Water Kit, which entails mixing the two solutions into equal parks and stirring for 3-5 minutes, slowly. Now this stuff will ruin some things. You need to be very careful what it touches, and whatever container you are using to mix and also whatever you are using to store is going to be ruined. YOU CAN'T PUT THIS STUFF IN YOUR SINK. It will ruin it. 

After mixing your solution thoroughly, you can pour it into your vase. After pouring it in, place your flowers into vase. Be sure to place the flowers in the position you want them to be FOREVER. After about an hour, you can no longer move your flowers. In my case, the flowers filled the vase so they were not moving around. If your flowers can move, you can always zip tie them together, or whatever you have to make them stay in one place. 


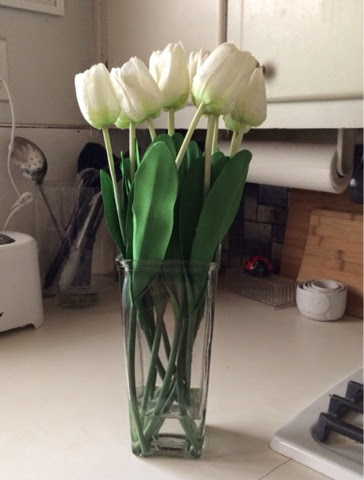
Leave your flowers over night to dry, and you're done! As simple as that. You now have your own homemade flower arrangement for much cheaper than the retail store prices. 

Comments

Popular posts from this blog

Blogtober Day 24! DIY Remove Black Stains from Hardwood Floors

      This blog is coming to you by accident, of course. I don't know if I've mentioned it much on this blog, but I have two pitbulls. I know, a lot to handle, and one of them is a puppy. She is horrible sometimes, but I can't help but love her. Our whole house is hardwood floors, which I love! With my two dogs, if the happen to have an accident it's really easy to clean up...or so I thought.  We have had a large living room rug down for about 6 months now. Over the weekend we decided to take it outside and air it out and do a little "Fall Cleaning". Low and behold underneath the rug were huge dark black spots on the hardwood. I immediately jumped on Pinterest to see what to do. It turns out dogs urine causes the wood to turn black (who knew?). So I found a solution that I'm really excited to share with you.  Peroxide! Awesome, I had plenty on hand and immediately started to try it out. At first I used a paint brush to apply it to the specific areas.  Almo

Personal Planner Setup

I have been using a planner for as long as I can remember. My little OCD self needs something to keep me grounded and on track. About 3 years ago I discovered Erin Condren as well as the planner community on social media (if you are a planner person check them out, it is such a positive and supportive group of people). If you're not familiar, the Erin Condren Life Planner is an A5 size planner (7" by 9") and is a thick planner. For me, this type of planner is not convenient for every day use so this planner stays at home on my desk and is used mostly for my creative side, not functionality. This brings me to my personal size planner, I use a Kate Spade Wellesley planner which can be bought at the Kate Spade Outlet stores (these outlets will ship to you so call around if you don't live close to one and are interested). Currently as pictured above I am using the red version which was re-released this Summer, and I also have a black version which is always in stock.

DIY IKEA Kitchen Shelf

  It is finally complete! I have been working on decorating this bad boy for a few weeks now and I'm in love! Thanks to my dear husband we were able to turn this cheap IKEA shelving unit into an adorable farmhouse style kitchen shelf pretty easily. See below for our step by step!    This is the IKEA Mulig Shelving Unit which is $59.99 for the largest size. This measures 47 1/4x13 3/8x63 3/4 "    We purchased a 3/4" piece of plywood at Home Depot in which we got cut in store for each shelf. These measure 46 1/2" by 13"    Also at a Home Depot we purchased a tube of Loctite Power Grip and a small can of Golden Pecan stain . This stain matches a few other items in our house so they would all look cohesive.    Once home, let the staining begin.      After one coat of stain was dry we used the Loctite to place the plywood on the shelves. We used sand bags to weigh down e