
Review! Lorac Pro Palette


My gift to myself for successfully completely my makeup no buy, the Lorac Pro Palette. I have wanted this thing forever, but lately I just haven't been able to justify any large purchases. After one full month of not even buying a mascara, I went for it. I felt like I deserved it.


This palette comes with 16 eyeshadows, 8 matte and 8 shimmer, and all very neutral wearable colors. 


These really aren't the best quality swatches, and I apologize for that. From left to right, White, Cream, Taupe, Light Pink, Mauve, Sable, Espresso, and Black. These colors are the top row and also the matte shades. 


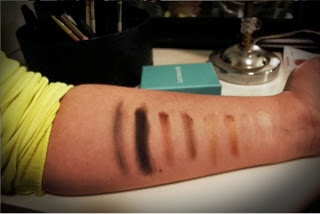
The next row is the shimmer shades (also, very bad swatches, I'm sorry). From left to right, Slate, Deep Purple, Garmet, Pewter, Light Bronze, Gold, Champagne, and Nude. 

So far I'm really impressed. The pigmentation is great and the quality is very high. I prefer to buy my shadows in palette form, because it makes me feel like my money is going further. My favorites so far are Mauve, Cream, Champagne, and Taupe. I love that this black is matte, you really can't go wrong with this. Overall, a great purchase for me and I'm very satisfied. 

This items retails for $42. 

Thanks!
-Kady

Comments

Popular posts from this blog

Blogtober Day 24! DIY Remove Black Stains from Hardwood Floors

      This blog is coming to you by accident, of course. I don't know if I've mentioned it much on this blog, but I have two pitbulls. I know, a lot to handle, and one of them is a puppy. She is horrible sometimes, but I can't help but love her. Our whole house is hardwood floors, which I love! With my two dogs, if the happen to have an accident it's really easy to clean up...or so I thought.  We have had a large living room rug down for about 6 months now. Over the weekend we decided to take it outside and air it out and do a little "Fall Cleaning". Low and behold underneath the rug were huge dark black spots on the hardwood. I immediately jumped on Pinterest to see what to do. It turns out dogs urine causes the wood to turn black (who knew?). So I found a solution that I'm really excited to share with you.  Peroxide! Awesome, I had plenty on hand and immediately started to try it out. At first I used a paint brush to apply it to the specific areas.  Almo

Personal Planner Setup

I have been using a planner for as long as I can remember. My little OCD self needs something to keep me grounded and on track. About 3 years ago I discovered Erin Condren as well as the planner community on social media (if you are a planner person check them out, it is such a positive and supportive group of people). If you're not familiar, the Erin Condren Life Planner is an A5 size planner (7" by 9") and is a thick planner. For me, this type of planner is not convenient for every day use so this planner stays at home on my desk and is used mostly for my creative side, not functionality. This brings me to my personal size planner, I use a Kate Spade Wellesley planner which can be bought at the Kate Spade Outlet stores (these outlets will ship to you so call around if you don't live close to one and are interested). Currently as pictured above I am using the red version which was re-released this Summer, and I also have a black version which is always in stock.

DIY IKEA Kitchen Shelf

  It is finally complete! I have been working on decorating this bad boy for a few weeks now and I'm in love! Thanks to my dear husband we were able to turn this cheap IKEA shelving unit into an adorable farmhouse style kitchen shelf pretty easily. See below for our step by step!    This is the IKEA Mulig Shelving Unit which is $59.99 for the largest size. This measures 47 1/4x13 3/8x63 3/4 "    We purchased a 3/4" piece of plywood at Home Depot in which we got cut in store for each shelf. These measure 46 1/2" by 13"    Also at a Home Depot we purchased a tube of Loctite Power Grip and a small can of Golden Pecan stain . This stain matches a few other items in our house so they would all look cohesive.    Once home, let the staining begin.      After one coat of stain was dry we used the Loctite to place the plywood on the shelves. We used sand bags to weigh down e