
DIY! Desk Makeover


Another personal mission of mine is finally complete. I have been stalking Craigslist trying to find the perfect desk for weeks now, and finally one popped up at the perfect price. Now of course, I couldn't just buy it and be happy with it, I had to give it some TLC, so I'm bringing you along on my journey. 


I found the desk for $50 on Craigslist, and of course I talked them down to $40 :) 


I went to Home Depot to check out the paint selection. I knew I wanted it to be a creamy white color, which we did have leftover paint from our last project, but it was Flat paint, and we had learned from our coffee table it wasn't the best choice for a surface that's going to be getting a lot of use. I still wanted the matte look so we went with eggshell. The color is Stone White by Glidden. 


The first step was to remove the drawers...


...and the hardware. 


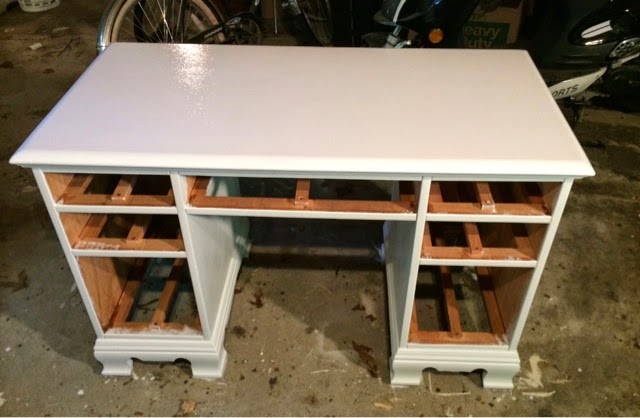
Then the painting began. I didn't sand or prime this piece. The surface was very nice to begin with, and the paint is a base type of paint so it has a primer type finish anyways. 


First coat is done! 


I was originally going to use the previous hardware, so I went ahead and put one coat on the drawer fronts and of course changed my mind. 


My boyfriend then came to the rescue with drywall spackle he had from work. This product dries white so the color wasn't an issue. 


In the meantime, I put a second coat on the desk. 


I went to Hobby Lobby and found my new hardware, and we started to measure. We marked all of the new holes and started drilling. After drilling our new holes and finished the drawers off with their last coat of paint. 


Also, while waiting I decided to paint the coffee table with the new color so it would stand up longer to the wear and tear. 


The desk needed a third coat and it was then good to go. 


I replaced my hardware with my new finds. 


And after a day of drying, it was ready to come inside. 


Our extra dining room chair fits perfectly, so we saved some money there! 

Total cost of this project...$80. Really a steal if you ask me!

Please let me know if you have any questions about renovating or painting furniture. I would love to answer any of your questions or give you my opinions!  

Comments

Popular posts from this blog

Blogtober Day 24! DIY Remove Black Stains from Hardwood Floors

      This blog is coming to you by accident, of course. I don't know if I've mentioned it much on this blog, but I have two pitbulls. I know, a lot to handle, and one of them is a puppy. She is horrible sometimes, but I can't help but love her. Our whole house is hardwood floors, which I love! With my two dogs, if the happen to have an accident it's really easy to clean up...or so I thought.  We have had a large living room rug down for about 6 months now. Over the weekend we decided to take it outside and air it out and do a little "Fall Cleaning". Low and behold underneath the rug were huge dark black spots on the hardwood. I immediately jumped on Pinterest to see what to do. It turns out dogs urine causes the wood to turn black (who knew?). So I found a solution that I'm really excited to share with you.  Peroxide! Awesome, I had plenty on hand and immediately started to try it out. At first I used a paint brush to apply it to the specific areas.  Almo

Personal Planner Setup

I have been using a planner for as long as I can remember. My little OCD self needs something to keep me grounded and on track. About 3 years ago I discovered Erin Condren as well as the planner community on social media (if you are a planner person check them out, it is such a positive and supportive group of people). If you're not familiar, the Erin Condren Life Planner is an A5 size planner (7" by 9") and is a thick planner. For me, this type of planner is not convenient for every day use so this planner stays at home on my desk and is used mostly for my creative side, not functionality. This brings me to my personal size planner, I use a Kate Spade Wellesley planner which can be bought at the Kate Spade Outlet stores (these outlets will ship to you so call around if you don't live close to one and are interested). Currently as pictured above I am using the red version which was re-released this Summer, and I also have a black version which is always in stock.

DIY IKEA Kitchen Shelf

  It is finally complete! I have been working on decorating this bad boy for a few weeks now and I'm in love! Thanks to my dear husband we were able to turn this cheap IKEA shelving unit into an adorable farmhouse style kitchen shelf pretty easily. See below for our step by step!    This is the IKEA Mulig Shelving Unit which is $59.99 for the largest size. This measures 47 1/4x13 3/8x63 3/4 "    We purchased a 3/4" piece of plywood at Home Depot in which we got cut in store for each shelf. These measure 46 1/2" by 13"    Also at a Home Depot we purchased a tube of Loctite Power Grip and a small can of Golden Pecan stain . This stain matches a few other items in our house so they would all look cohesive.    Once home, let the staining begin.      After one coat of stain was dry we used the Loctite to place the plywood on the shelves. We used sand bags to weigh down e